PrestaShop
Installation & Setup Guide
This guide explains how to install and configure the Paypercut Payments Plugin for PrestaShop so you can start accepting online payments.
Before you start
You will need:
- A Paypercut merchant account — register at https://dashboard.paypercut.io/register
- Paypercut API keys (sandbox for testing, production for live)
- Admin access to your PrestaShop store
- Paypercut PrestaShop plugin package (.zip file)
- Supported PrestaShop versions: 1.7, 8, 9
Step 1 — Install the Paypercut plugin
-
Download the Paypercut PrestaShop plugin (.zip) from the releases page:
-
Log in to your PrestaShop Admin panel.
-
Go to Modules → Module Manager.
-
Click Upload a module and choose the downloaded .zip file.
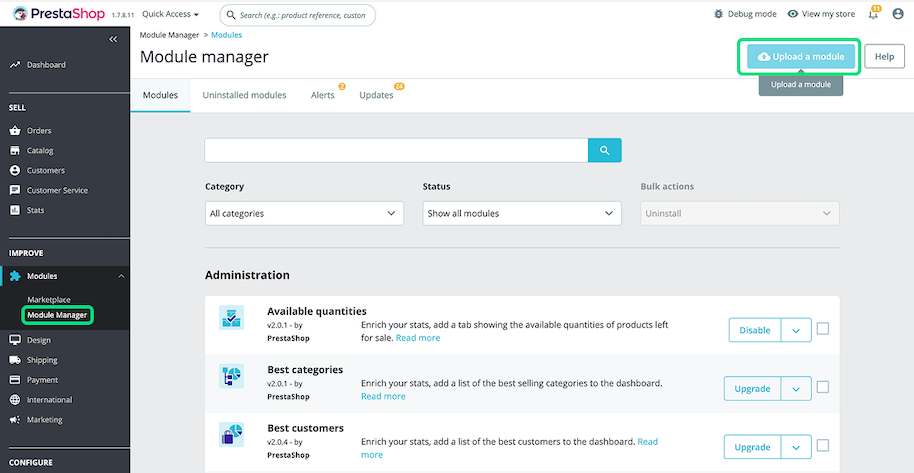
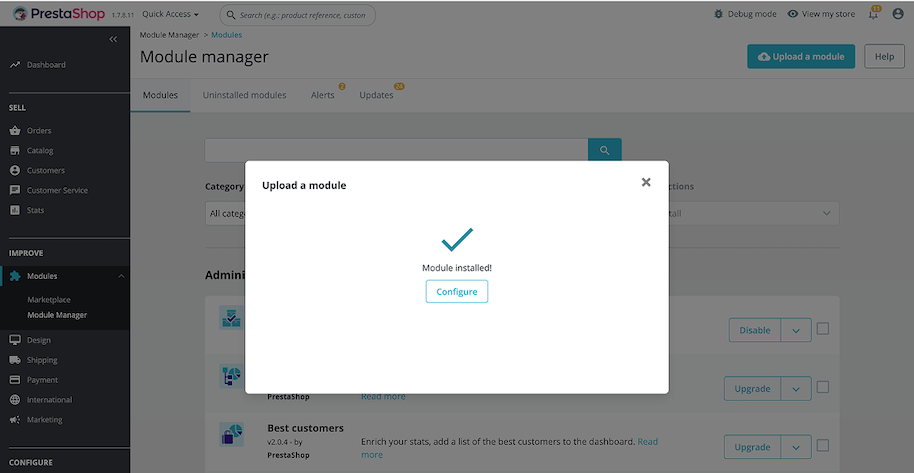
- Wait for the installation to complete. The Paypercut Payments module will appear in the module list.
Note: If the module does not appear immediately, refresh the Module Manager page and search for "Paypercut Payments".
Step 2 — Configure the Paypercut plugin settings
- In Modules → Module Manager, find Paypercut Payments and click Configure.
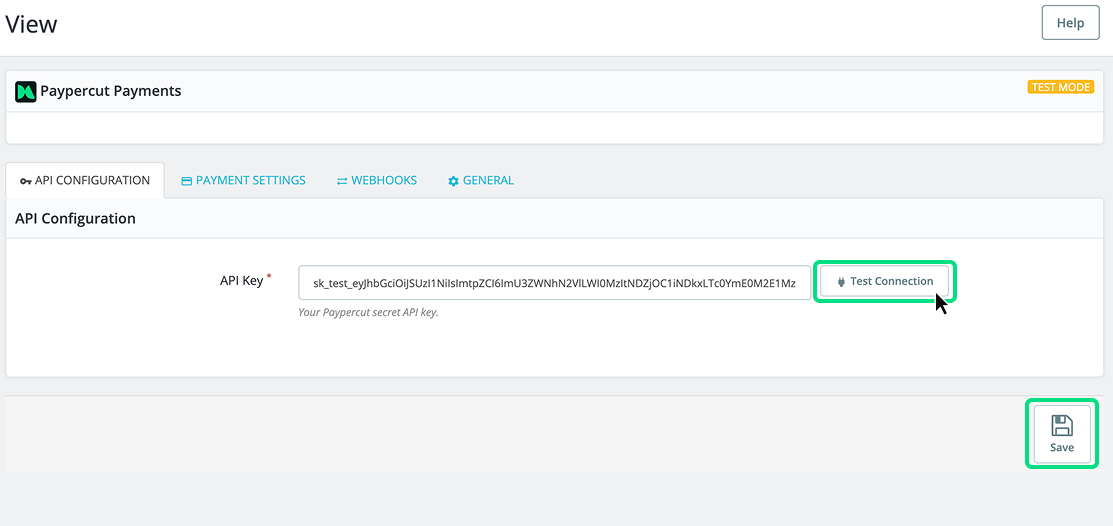
- API Configuration
- API Key: paste the Paypercut API key generated from the Paypercut Merchant Portal
- Test connection: click to verify connectivity
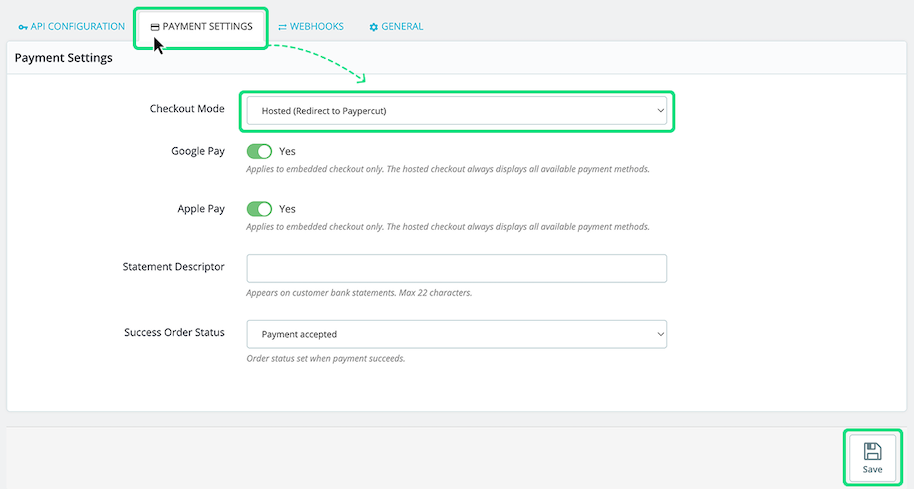
- Configure payment settings
- Checkout Mode: Choose between Embedded or Hosted checkout mode
- Enable or Disable Google Pay and Apple Pay (available only for Embedded checkout)
- Statement descriptor: Text shown on customer bank statements (Max 22 characters)
- Success Order Status: Choose which order status represents a successful payment (we recommend “Payment accepted”)
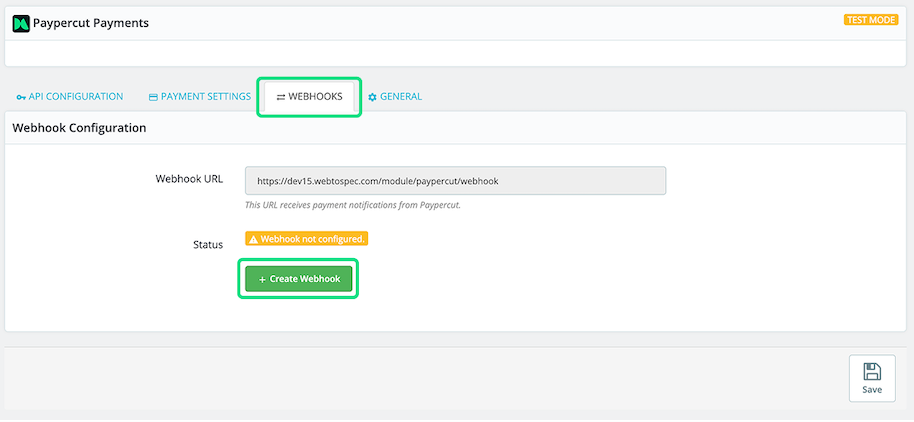
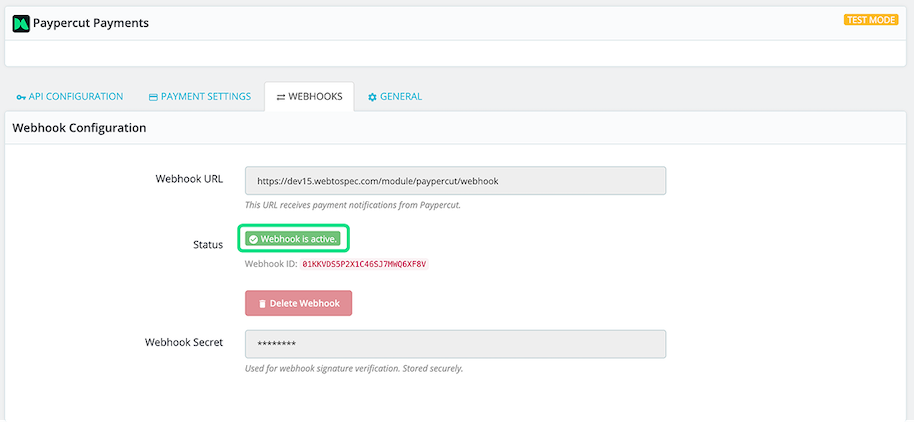
- Configure webhooks
- Open the Webhooks tab and click Create Webhooks.
- The required webhooks will be generated automatically and will allow Paypercut to send payment status updates to your store.
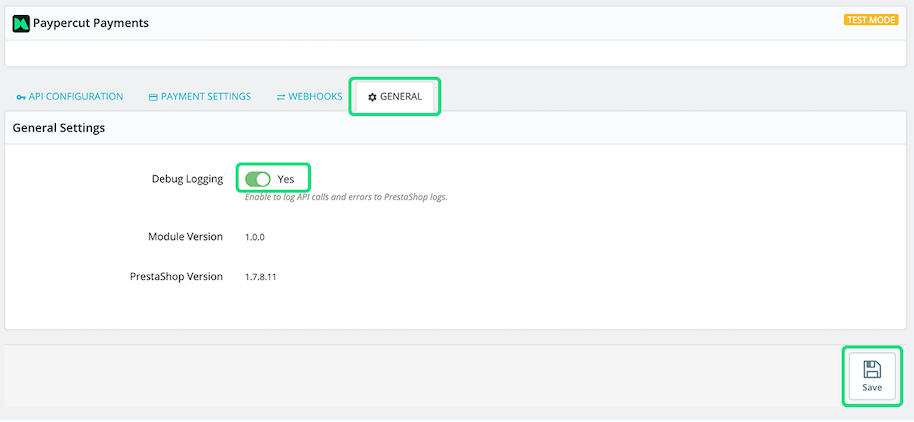
- Enable debugging (optional)
- To enable debug logging for easier troubleshooting, go to the General tab and set Debug Logging to Yes.
- Click Save changes.
Now you should be able to process payments through the PrestaShop plugin.
FAQ
Q: Do I need anything besides the API Key? A: No — the API Key is the only credential required for the plugin.
Q: Is the API Key created in PrestaShop? A: No — create and copy the API key from your Paypercut Merchant Dashboard.
Q: Will installing Paypercut affect my existing checkout? A: No — Paypercut installs as an additional payment option.
For further help
- Merchant Dashboard: https://dashboard.paypercut.io
- Developer docs & API reference: https://docs.paypercut.io/api-reference
- Support: integrations@paypercut.co