OpenCart Integration — Installation & Setup Guide
This guide explains how to install and configure the Paypercut Payment Gateway in your OpenCart store so you can start accepting online payments.
Before you start
You will need:
- A Paypercut merchant account — register at https://dashboard.paypercut.io/register
- Paypercut API keys (sandbox for testing, production for live)
- Admin access to your OpenCart store
- Supported OpenCart versions: v2.x, v3.x, v4.x
Step 1 — Install the Paypercut extension
- Log in to your OpenCart Admin panel.
- Open Extensions → Marketplace (or Extensions → Installer for manual upload).
- Search for "Paypercut" and select Paypercut Payment Gateway.
- Click Install and follow the Marketplace prompts (enter Marketplace credentials if requested).
Notes:
- If you downloaded an extension package, upload it via Extensions → Installer then continue to Step 2.
Step 2 — Activate the extension
After installation you must refresh OpenCart modifications and caches:
- Go to Extensions → Modifications (or System → Maintenance → Modifications in some installs).
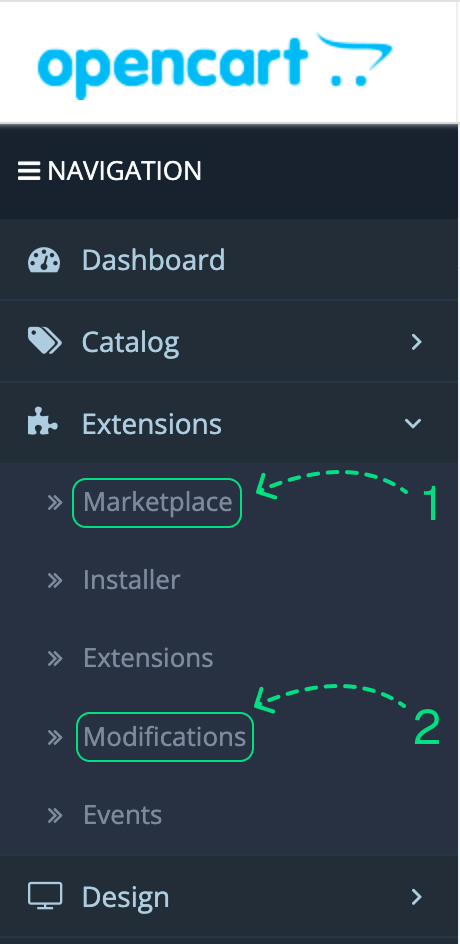
- Click Refresh (and Clear Cache if available)

This simply tells OpenCart to activate the newly installed payment method. For OpenCart v4, this may also refresh the system cache automatically.
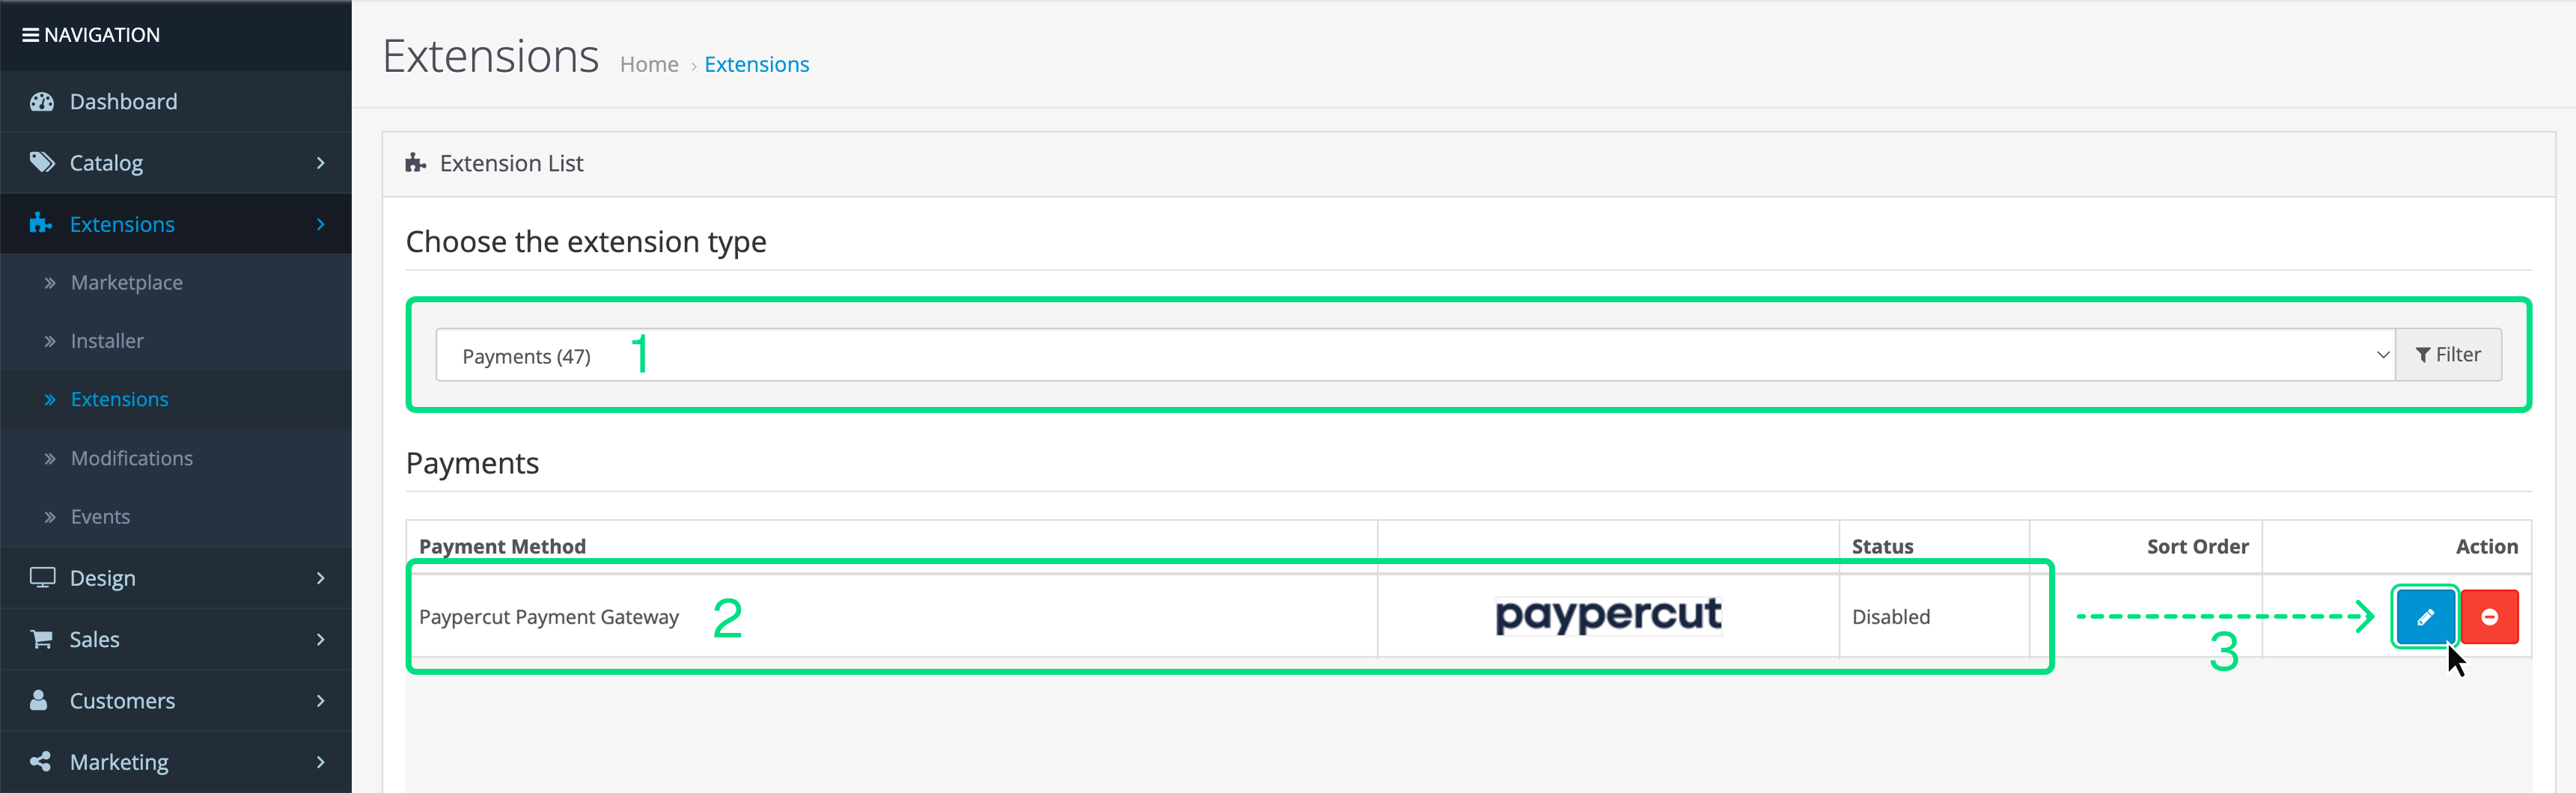
Step 3 — Enable Paypercut payment method
- Go to Extensions → Extensions.
- Choose "Payments" from the dropdown.
- Find "Paypercut Payment Gateway" and click Edit.
- Set Status = Enabled and Save.
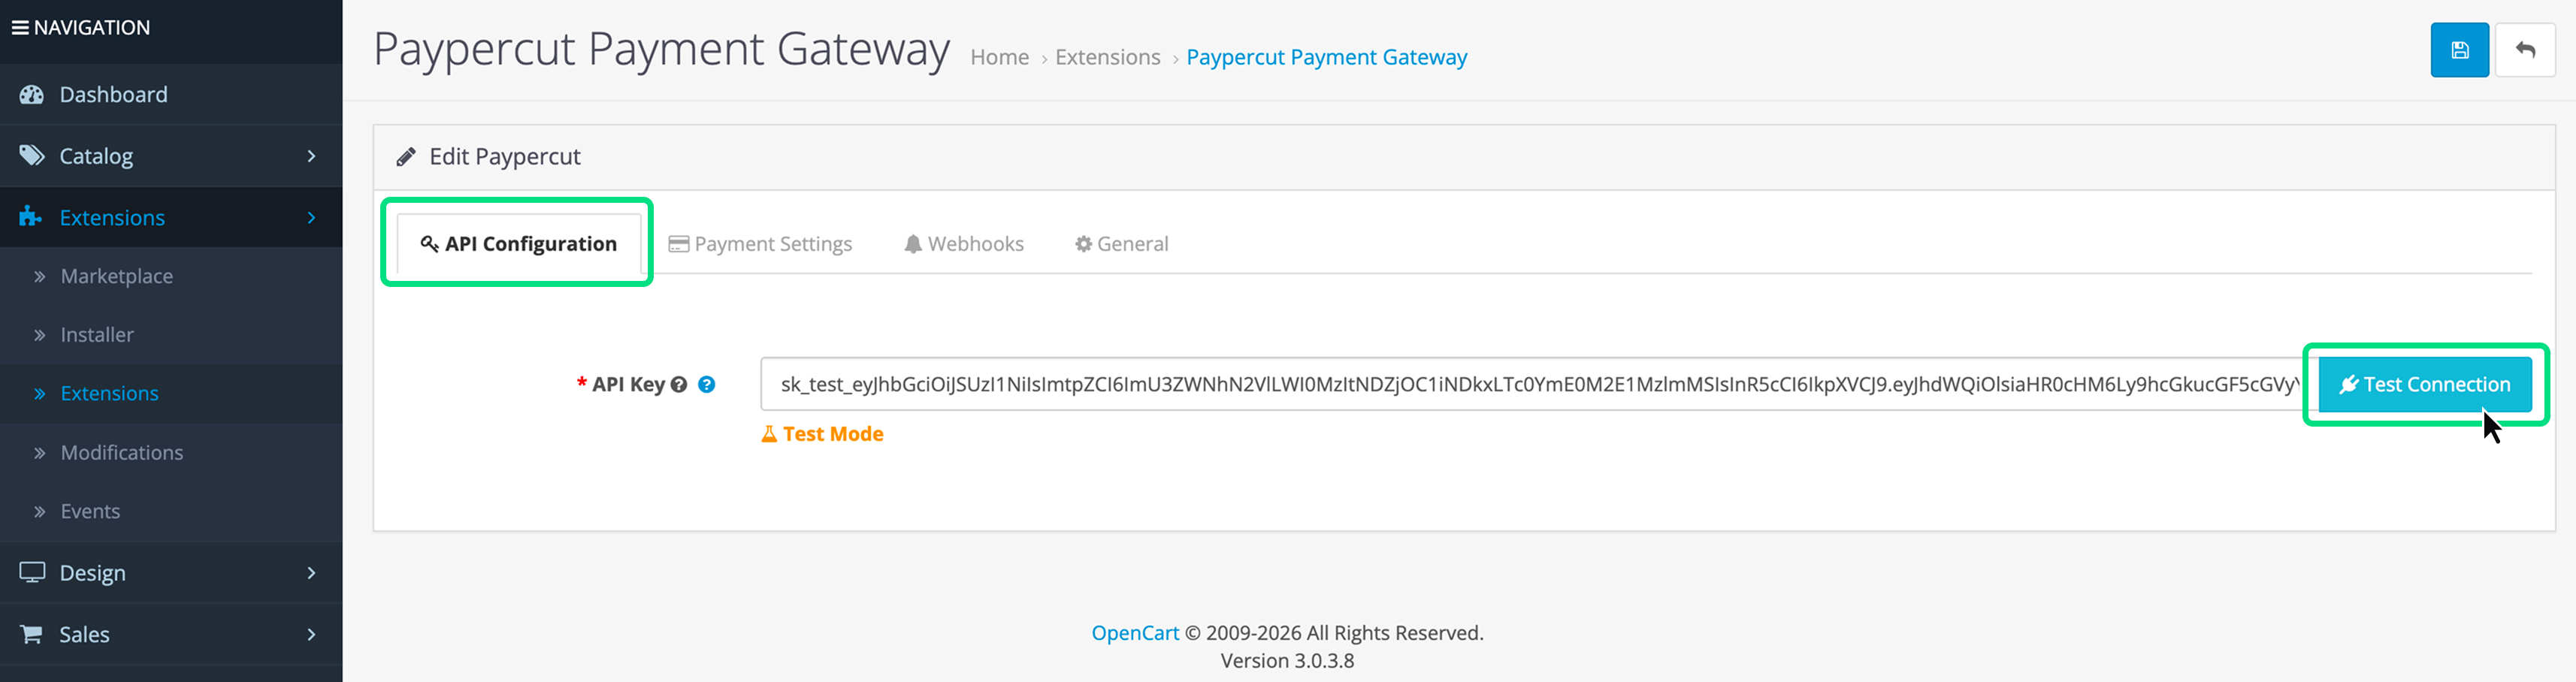
Step 4 — Configure Paypercut settings
In the Paypercut settings page:
- API configuration
- API Key: paste your Paypercut key (sandbox or production).
- Test connection: click to verify connectivity.
- Mode: choose Test or Production.
- Payment settings
- Statement descriptor: name shown on customer statements (follow card network rules).
- Wallets: enable Apple Pay and/or Google Pay if required.
- Checkout mode: choose Embedded (iframe on your site) or Redirect (hosted checkout).

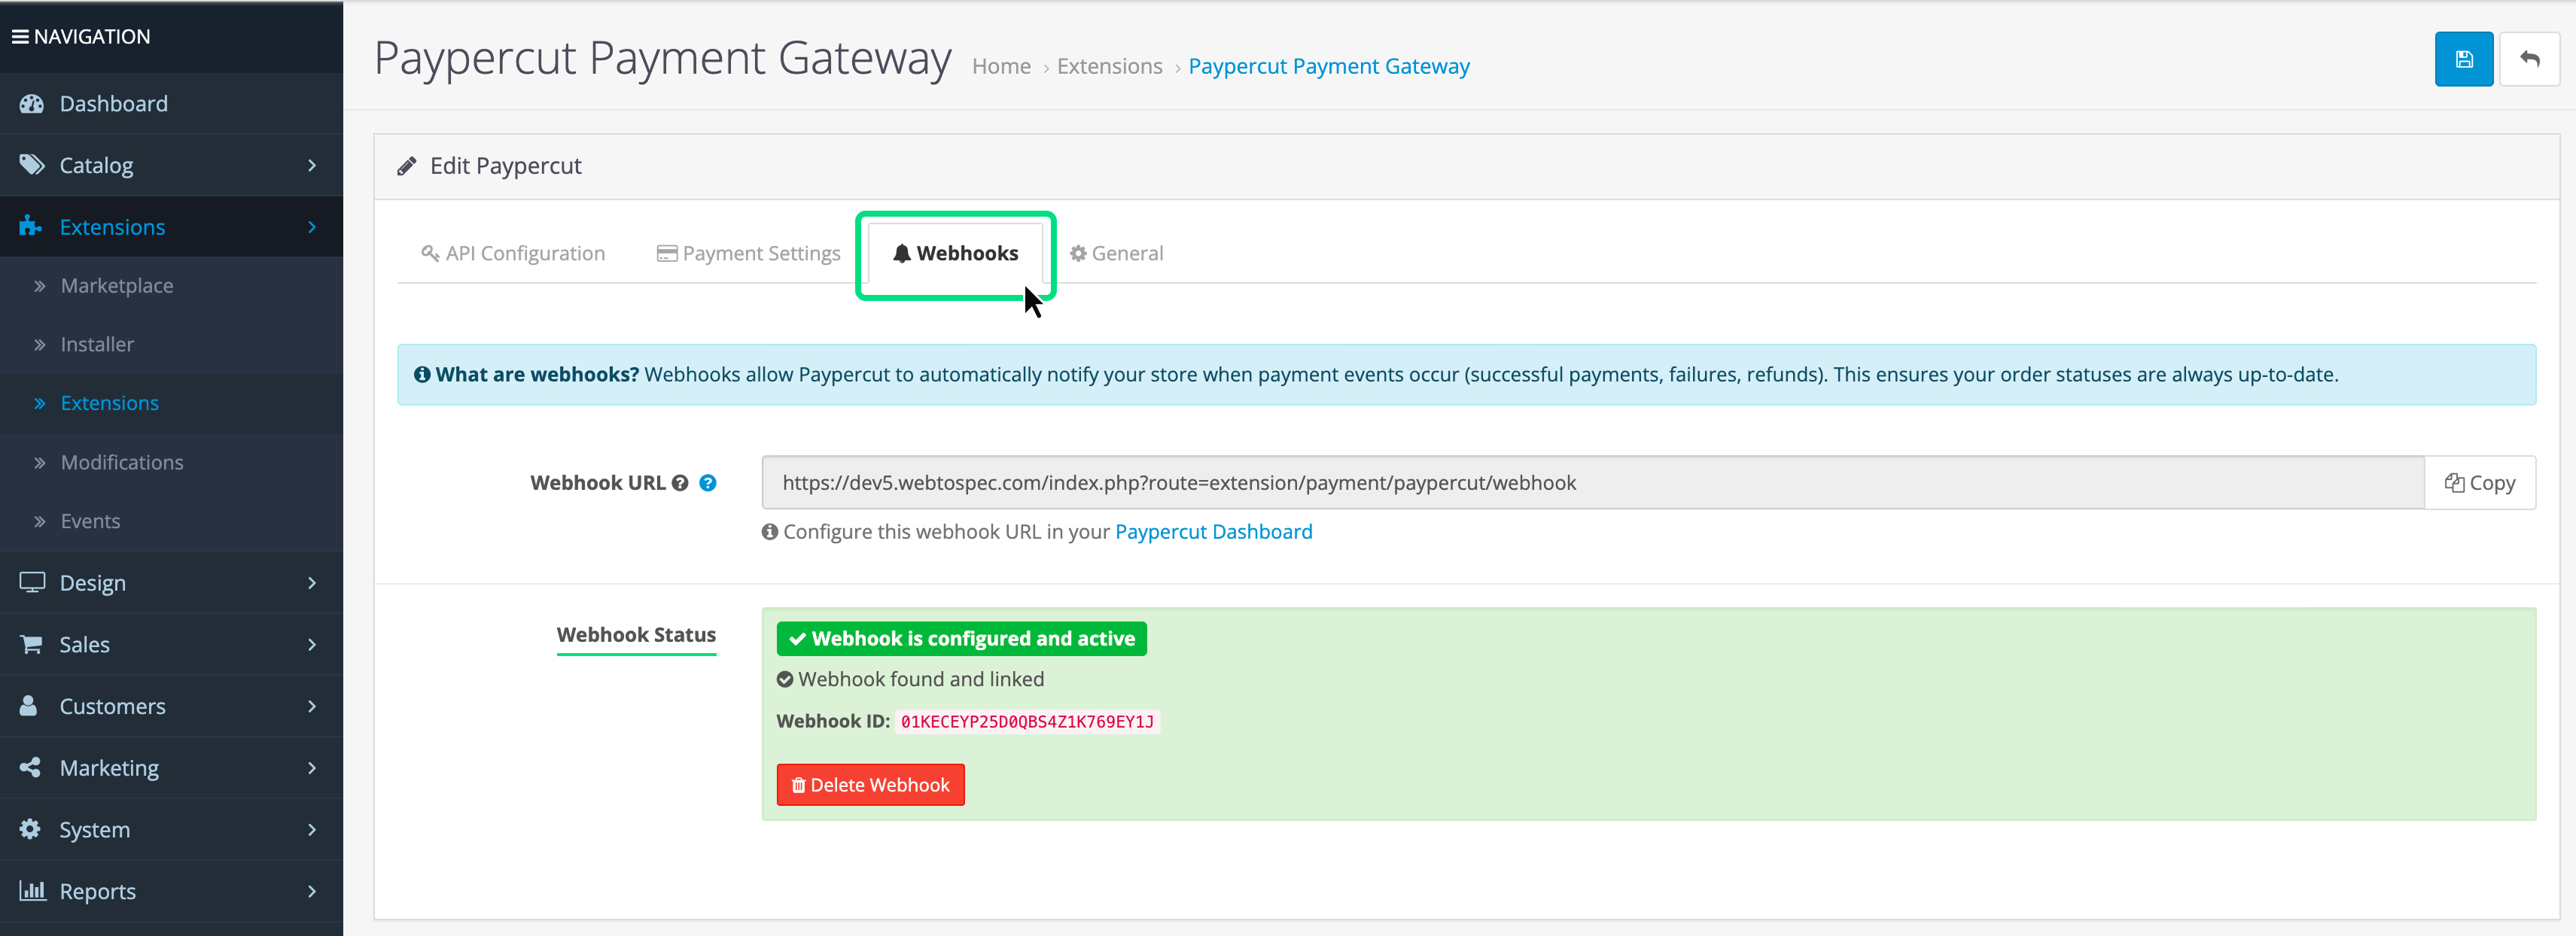
- Webhooks
- Webhook URL: configure the endpoint provided by OpenCart (or the module) in your Paypercut Dashboard.
- Test the webhook delivery from Paypercut and confirm the status in OpenCart.
Tips:
-
Webhooks must be HTTPS and reachable from Paypercut.
-
Use separate sandbox and production webhook endpoints.
-
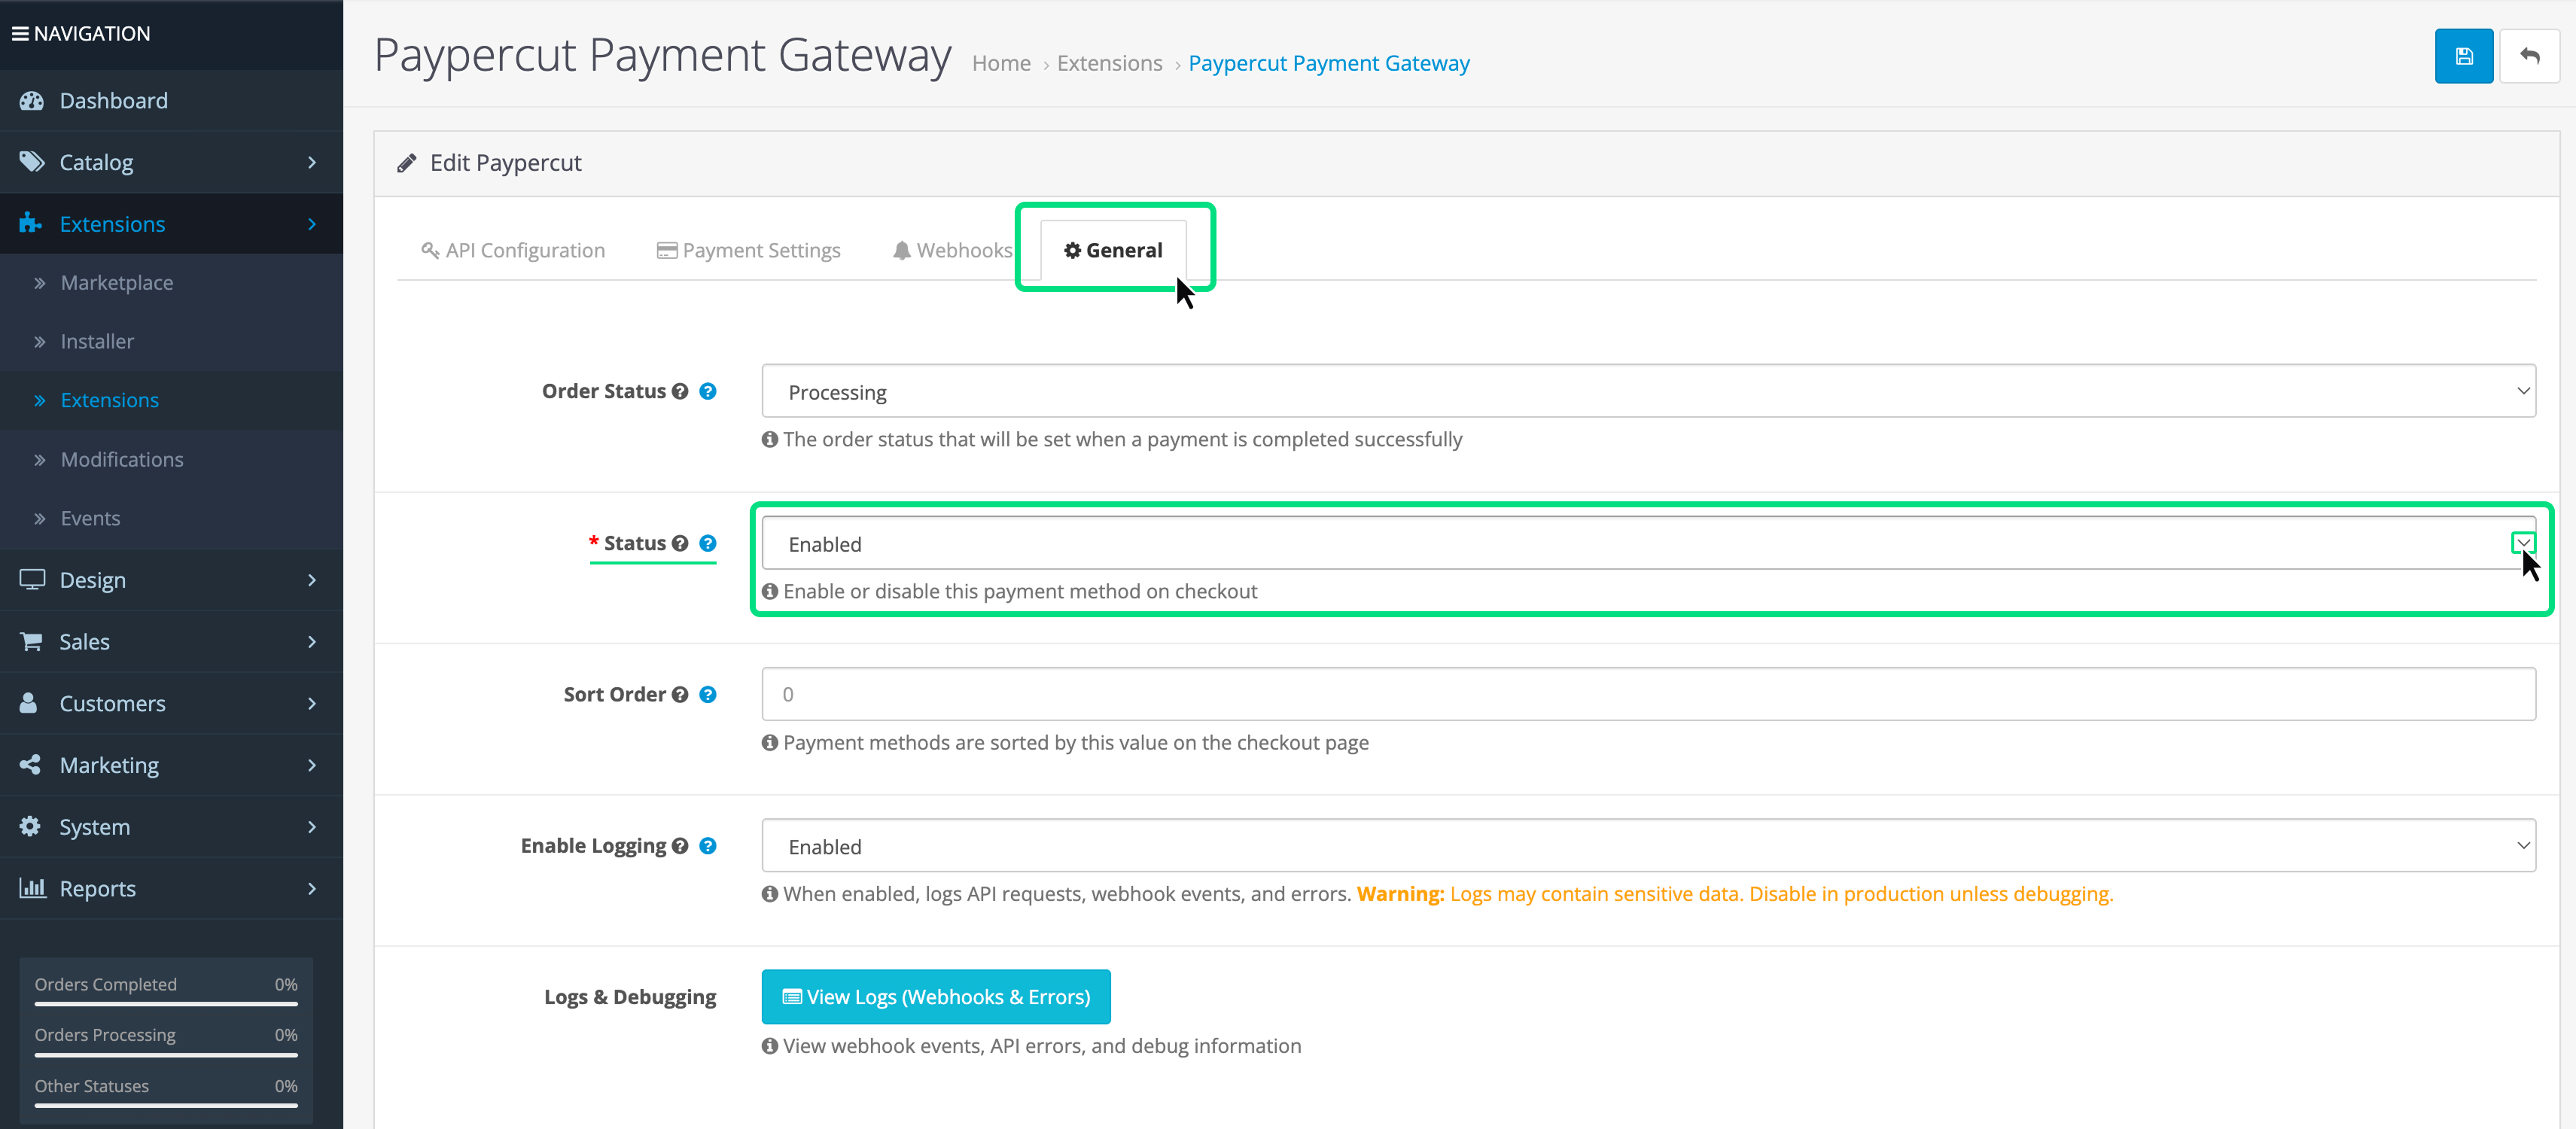
General
In this tab you have to make sure that your payment method is “Enabled”
Step 5 — Test payments (Sandbox mode)
- Set Mode = Test and save settings.
- Place a test order in your storefront.
- Complete checkout using Paypercut test card details (see Testing → Test Cards).
- Verify:
- Payment completes successfully.
- Order status updates in OpenCart.
- Customer is redirected back to your store (success/cancel pages).
- Webhook events are received and processed.
When testing is successful, switch Mode → Production, update API key to the live key, and re-check webhooks.
Troubleshooting
-
Payment option not visible at checkout
- Ensure Paypercut module is Enabled
- Verify Geo Zone settings (if restrictions applied)
- Confirm you refreshed Modifications after install
-
Webhook events not received
- Confirm webhook URL is correct and HTTPS
- Check server firewall or security plugins blocking inbound requests
-
API connection fails
- Verify API key and environment (sandbox vs production)
- Test network connectivity from your server to api.paypercut.io
FAQ
Q: Do I need anything besides the API Key?
A: No — the API Key is the only credential required for the plugin.
Q: Is the API Key created in OpenCart?
A: No — obtain API keys from your Paypercut Merchant Dashboard.
Q: Will installing Paypercut affect my existing checkout?
A: No — Paypercut is installed as an additional payment option.
Q: Why refresh modifications after installation?
A: Refresh applies new extension changes so OpenCart recognizes and activates the payment method. It does not affect products, customers, or orders.
You're ready to go
After switching to Production mode and verifying a live transaction, your OpenCart store will be ready to accept payments through Paypercut.
For further help:
- Merchant Dashboard: https://dashboard.paypercut.io
- Developer docs & API reference: https://docs.paypercut.io/api-reference
- Support: help@paypercut.co